Disclosure: This site may contain affiliate links. If you make a purchase through these links, I may receive a commission at no additional cost to you. However, all opinions are my own.

1. Selecting hosting for the bot
Forget about regular web hosting. For a bot, the only reliable solution is a VDS/VPS (Virtual Private Server). This gives you complete control over the operating system, the ability to install any libraries, and guaranteed resources.What to look for when choosing:
-
- Location: If your audience is primarily located in the CIS, choose servers in nearby data centers for minimal ping.
- Tech stack: Make sure your provider allows you to install up-to-date versions of Python (3.12+), Node.js, or Docker.
- AI support: If your bot uses local language models (LLM), you may need GPU-accelerated servers. For regular bots, standard processing power is sufficient.
- Scalability: You can add more RAM in one click if your bot becomes popular.
2. System requirements and tariffs
Currently, the hardware requirements have increased slightly, but remain affordable:-
- A simple bot (text commands): 1 GB RAM, 1 CPU Core. A VPS for €1 per month is more than enough for even a few small scripts.
-
- Bot with database (PostgreSQL/Redis): 2 GB RAM.
-
- OS: The clear choice is a modern operating system, such as Ubuntu 24.04 LTS or 26.04 LTS. Most documentation and libraries are written specifically for these distributions.
3. Server setup
Let’s assume you’ve already rented a server. Now we need to bring it online. We’ll use the SSH protocol for management.Step 1: Connection
To manage the server we need a terminal, for example Termius, MobaXterm.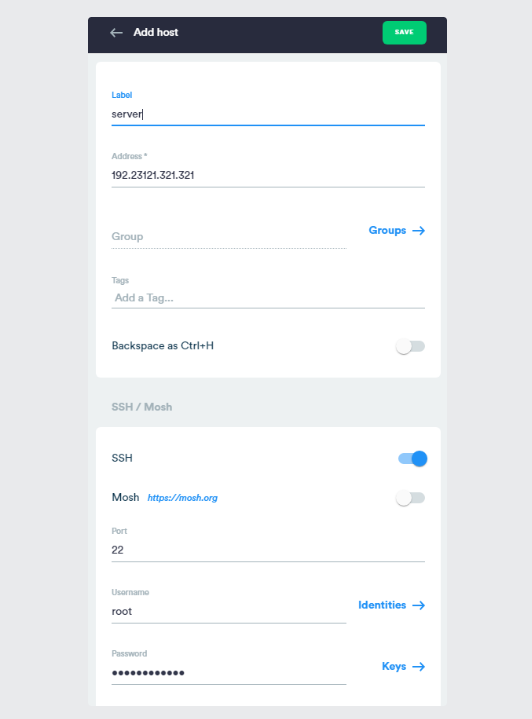
-
- Open Termius and create a new connection (New Host).
- Enter your hosting account details:
-
- Hostname (IP Address): The address of your server.
- Port: usually 22 (unless the hosting specifies otherwise).
- Username: most often root.
- Password: your password.
-
-
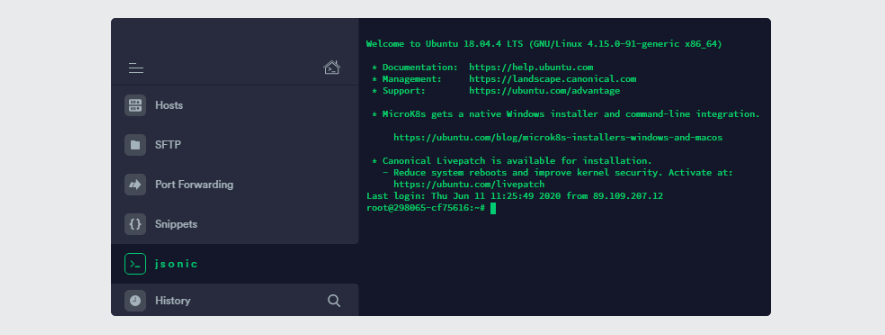
- Save the settings and click on the name of the created host in the list.
- If you see a black console window with a system welcome message, congratulations, you are “inside” your server.
Step 2: Preparing the Environment
First, update the packages and install Python:sudo apt --reinstall install python3 -y sudo apt --reinstall install python3-pip -y Now let’s install the library for working with the Telegram API. pyTelegramBotAPI remains the default, but the commands are the same: pip3 install pyTelegramBotAPI --break-system-packages Step 3: Process Manager (PM2)
To prevent the bot from crashing after closing the console and to automatically restart it if there are any crashes, install PM2. It requires Node.js:sudo apt install nodejs sudo apt install npm npm install pm2 -g 4. Uploading the code to the server
The easiest way for beginners is the SFTP protocol.-
- In Termius, open the SFTP tab.
- Connect to your host.
- Create a folder (e.g., /root/my_bot/).
- Simply drag your bot files (main.py, configuration files, and the database) from your computer into this folder.

5. Launch and control
Go to the bot folder via the console: cd folder_namepm2 start main.py --interpreter=python3 (replace main with the name of the bot's executable file) You can check the bot’s status with the pm2 list command. If the “status” column says “online,” everything is working fine. Useful PM2 commands
-
pm2 list— view the status of all running bots.
-
pm2 logs— Check the logs (if the bot isn’t working, the reason will be there).
-
pm2 restart my_telegram_bot—Restart the bot after updating the code.
FAQ

Here and now! Founder and leading expert of the website "Hosting Consultant" (DIEG.info), with 15 years of experience in DevOps, internet marketer in the field of website promotion and online services.
Latest posts by Dmytro Yakovenko (see all)